
Home » Office of Vice President for Student Affairs » Digital Engagement » Produce Great Videos with your Smartphone
PRODUCE GREAT VIDEOS WITH YOUR SMARTPHONE
Student Affairs
306 Memorial Hall
Athens, GA 30602
(706)-542-3564 | askstudentaffairs@uga.edu
A primer on the basics of smartphone video production
- The Goal: This isn’t about perfection. You’re striving for decent quality audio and video, interesting, informative, and authentic content, and a reasonable length.
- The Scene: Choose a background that is interesting without being too busy or distracting. Make sure you can control the environment you’re filming in and avoid interruptions.
- Audio: Beware of the outdoors, they’re noisy and unpredictable. Use earbuds with built in mic or a second phone to get better audio in challenging environments.
- Lighting: Take advantage of natural light if available, move artificial lighting sources around if you can. The subject should be lit from the front and both sides as evenly as possible. Avoid backlighting.
- Camera Settings: Go with as high a resolution as you can while keeping in mind the final media file size. The higher the frame rate, the smoother the video, but 30fps is fine for most contexts. Clean your lens!
- Production Quality: Avoid digital zoom, zoom with your feet instead. Shoot horizontal (landscape) not vertical (portrait). Stabilize the phone as much as possible with a tripod, selfie stick, or by holding with two hands and relying on image stabilization. Lock your focus and exposure to mitigate your phone continually hunting for focus and exposure while you’re shooting. Keep it simple. Avoid special effects, time-lapse, slow motion and other “advanced” techniques if you aren’t familiar with them.
- Get down to Business: A good video consists of an Intro (who are you and what is this about), a body (the meat of the video), and an Outro (calls to action and “Thanks for watching!”). The Intro and Outro should only be a few seconds long each. Outline your talking points and perfect your delivery. The tone should be conversational, not formal. Keep it short. Some platforms have time constraints for video and others have recommended times backed up by market research. Generally, keep it between 30 seconds and 2 minutes.
Creating videos with your smartphone isn’t about perfection. This isn’t a Hollywood studio level production. In fact, for most of the platforms you’ll be targeting (social media) too high of a production quality can come across as unauthentic. What you’re going for is a competently produced video that covers the basics of good technique. Namely, decent quality audio and video, interesting, informative, and authentic content, and a reasonable length.
Creating compelling video starts with picking the right “canvas”. Choose an area with a background that is aesthetically pleasing without being distracting. Make sure the background isn’t too busy and that there will be a good contrast between the subject and the background. Ensure that you have a good degree of control over the space or environment where you will be filming. Somewhere where you can rearrange furniture and lighting and can control noise is preferable. Finally, find a space where there will be little potential for being interrupted.
PRO TIP: Use your phone’s LCD as a “frame”. Pan it around a space to find the best possible composition for your subject and background, while keeping in mind the lighting as you do so. Once you’ve found the best frame, mark the spot and orientation so you can set up your scene.
While it may be tempting to film outside, be aware that, especially in urban areas, the outdoors are noisy. Vehicles and planes will go by regularly while you are filming and are unpredictable. You could be in the middle of the “perfect take” when your neighbor decides to start up her lawn mower. Even without cars, planes, and lawn mowers, there is a large amount of ever-present ambient noise outside that can overwhelm the microphone built into your smart phone.
PRO TIP: One way to mitigate ambient noise is to wear earbuds that have a built-in microphone instead of relying on your smartphone’s mic. Another technique is to use two phones. Use one phone to record video and set the second phone to record audio and put it in your subject’s shirt pocket. This way, you can get the best camera angle and the best possible audio simultaneously. The downside to this second technique though is that it requires post-production editing to sync up the audio and video from the two phones.
Since you don’t have access to studio lighting, take advantage of the natural light that windows provide in addition to whatever artificial lighting the space has. Note the strongest source of light in the space and use that to your advantage. In the best lighting scenarios, the subject will be evenly lit from the direction of the camera and both sides. Light coming from behind the subject will cause him/her to be silhouetted, which will put them in shadow and create problems with exposure and focus. Prevent backlighting by ensuring that you don’t have a window or bright light source directly behind the subject.
Pro TIP: If filming outdoors, be aware of the time of day and the weather. Noon on a clear day may seem like a good scenario, but in reality the intense sunlight creates harsh shadows on the subject’s face and will cause them to squint, while an overcast or cloudy day or shooting at dusk or dawn on a clear day can produce a softer, more even light.
Before taking video on your phone, make sure you’ve set it up properly. One important setting is video resolution. Most modern smartphones are capable of taking video in 1080 HD or even 4K resolutions. The higher the resolution, the sharper and more detailed the image. Aim for at least 720p or above.
Next, check the frame rate, which sets how many individual frames per second (fps) your video records. Common settings are 30 fps, 60 fps, and less commonly, 24 fps. The higher the number, the smoother-looking video you’ll produce. However, most video is shot at 30 fps and this will be sufficient for most people’s needs.
The steps for setting resolution and framerate vary depending on phone model and OS, but are generally easy to find in your camera app.
When choosing your resolution and frame rate it is important to understand how this affects the size of the media file that will be produced. The higher the frame rate and resolution, the bigger the file you will output. For instance, a five-second video shot at 4K-resolution will be roughly four times the size of the same video shot in 1080 HD resolution. Note the amount of space you have on your phone before you begin and take some test videos at different lengths and resolutions before starting your actual video to ensure that you will have enough space on your phone for the final video file.
PRO TIP: Before you shoot anything, clean your lens. When we’re not getting fingerprints all over them, a smartphone lives in your pocket with the lint and dust. A dirty lens can have a noticeable effect on the image quality of your video. Use a microfiber cloth or lens cleaning wipe if you have them, or gently wipe your lens with a damp paper towel before you start shooting.
- Avoid using digital zoom. Most current smartphones don’t have optical zoom like a dedicated SLR camera. Instead they use a software driven digital zoom, which lowers the resolution and image quality and can produce bad results. It’s best to avoid using zoom altogether, but if you must zoom, zoom with your feet. Move the camera physically closer to the subject instead of using the camera’s digital zoom.
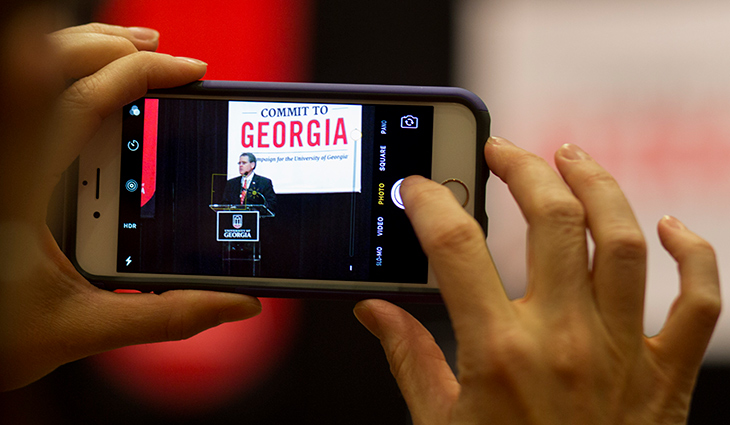
- Orient your phone horizontally (landscape). Nothing says “amateur” more than a vertically (portrait) aligned video shot on a smartphone. You’re striving for authenticity, not incompetence. While Instagram and Snapchat accommodate and seemingly push users to create vertically aligned video, you’ll get a much more competent looking video by sticking with a horizontal format.
- Use a tripod if you have one. In lieu of a tripod, a selfie stick taped to a chair or ladder is also an option. This will ensure that your video will be stable and the shot will be consistent if you need multiple takes. If you don’t have a tripod or selfie stick, use two hands to hold your phone when recording. Most smartphones have built in image stabilization, and with two hands the image can be almost as stable as with a tripod.
- Lock Focus and Exposure. In less optimal lighting conditions, or in places where you can’t totally control the environment (like outdoors) your smartphone may try to continually hunt for optimal focus and exposure while you’re recording. To prevent this, once you’ve got your scene and subject set up, make sure your exposure looks good and the subject is in focus, and then lock both the exposure and the focus in place. On Android devices, tapping on the screen at the point where you want to focus will lock it on that point. On iPhones, holding your finger in place at the focal point will lock it. Most smartphones will also provide a way to lock the exposure, but the method depends on your specific phone model and OS.
- Keep it simple. Don’t try to use slow motion, time-lapse, multiple camera angles or visual effects if you’re new at this. These are features more suitable for highly experienced vloggers and editors and, when used poorly, can ruin an otherwise good video.
The anatomy of a good video:
- Intro: This is where you introduce yourself and the theme/subject of the video. In vlogs, typically there are animations or montages, music, and graphics involved in the intro as well, but for the purposes of this primer we will ignore those. You’re telling your audience what the video is about and what they’re going to get out of it. Generally, the intro leads into the body of the video by saying, “So let’s get started” or something to that effect. Your intro should be short and sweet, no more than a few seconds.
- Body: This is the main content of the video and the meat of what the video is all about. This should be the longest section of your video.
- Outro: This is the conclusion of the video where you recap what you talked about, state any call(s) to action (“make sure to like and follow” and/or “go to our website for more details” etc) and thank your audience for watching. With vlogs there may be a closing montage or animation and music, but as stated in the intro, that is outside of the scope of this document. Again, keep it short and sweet, no more than a few seconds.
Perfect your delivery
Know your content and practice delivering it without having to think too much about it. Avoid unnecessary pauses and words like, “um”, “ah”, “like” etc. While having a script can be helpful, you can come across as insincere if you sound too robotic in your delivery or like you’re reading from a page. It’s best to have a good outline of your talking points and practice delivering those “off the cuff” rather than writing out every word. Do as many takes as you need, but remember that perfection isn’t the goal. Your goal is interesting, informative, and authentic. Finally, time yourself to ensure that you can stay within the time constraints of the platform on which you’re posting.
Keep it short
There are multiple reasons why less is more with video:
- The longer the video, the bigger the video file. Potentially leading to storage and processing issues on your device.
- Unless you’re an experienced video editor with video editing software and equipment, your editing capabilities are limited. The shorter the video, the less potential editing you have to do. In fact, you should aim at attempting to eliminate all editing by doing one take. You may still have to trim a few seconds off of the beginning or end, which you can easily do with the editing tools on your phone.
- Your audience has a limited attention span. It’s not their fault, it’s simply a characteristic of the digital online space. At any given moment, there are multiple other things competing for your audience’s attention. To ensure that they’re going to get your message, keep it brief. If you can’t cover the subject in the time limits listed below, you should probably consider doing a series of videos instead of just one.
- Video length is limited on some platforms. According to the digital agency 2060Digital, the following are the current video length requirements/recommendations by social media platform (n.d., Aschmidt):
- Facebook
- Your videos should be no more than two minutes in length. Multiple studies (including this one from Wistia) have shown that for most videos, engagement tends to fall off sharply after the two-minute mark.
- Short videos that are fun and/or informative and are able to be easily understood without sound tend to be the best performers on Facebook.
- It is better to upload your video directly to Facebook rather than including a YouTube link, as Facebook’s algorithm tends to prioritize native video content.
- Twitter
- Your videos should be no more than 30 seconds in length, since Twitter currently has a 30-second limit for video content.
- Consider using video on Twitter as a way to “tease” full-length content that can be found on your website.
- One of the most effective uses for Twitter video is to post short comments, replies or reactions to questions or messages from fans and followers.
- Instagram
- Your videos should be no more than 60 seconds in length, as that is the upper limit for what the platform will support. Data compiled by HubSpot suggests 30 seconds might be an ideal time frame, as Instagram videos that received the most comments typically averaged about 26 seconds in length.
- Be sure to use plenty of relevant hashtags to facilitate easier discovery of your videos.
- YouTube
- For optimal engagement, keep your videos around the two-minute mark.
- As the preeminent digital video platform, YouTube lends itself to more in-depth content such how-to tutorials, FAQ sessions, video blogs (vlogs), etc.
- Consider YouTube to be a “digital library” where you can store a repository of video content that can be organized into various playlists by topic. As you continue adding videos to your channel, you will accumulate an impressive catalog of visual assets that will be engaging and helpful to the audience you’re trying to reach.
- Facebook
Aschmidt. The Right Video Length for Each Platform. 2060Digital. No Date. https://2060digital.com/blog/right-video-length-platform/
O’Kane, Sean. How to shoot great video with your smartphone. The Verge. July, 2017. https://www.theverge.com/2017/7/26/16026238/smartphone-video-editing-apps-how-to-tips-iphone-android
Sullivan, Terry. A Beginner’s Guide to Taking Great Video on Your Phone. The New York Times, April, 2018, https://www.nytimes.com/2018/04/17/smarter-living/beginners-guide-phone-video.html
Harrell, L. Scott. 7 Ways to Get Professional Quality Video from Your Smartphone. August, 2022. https://vtrep.com/7-ways-get-professional-quality-video-smartphone/
Digital Engagement
Digital Engagement
306 Memorial Hall
University of Georgia
Athens, GA 30602
Wes Summers
Digital Engagement Lead for Student Affairs
wsummers@uga.edu
Stan Jackson
Assistant to the Vice President for Communications, Data, and Technology
ugastan@uga.edu